
I know we just downed Oregoreger recently and it was a great fight, so I decided to make a visual strategy guide.
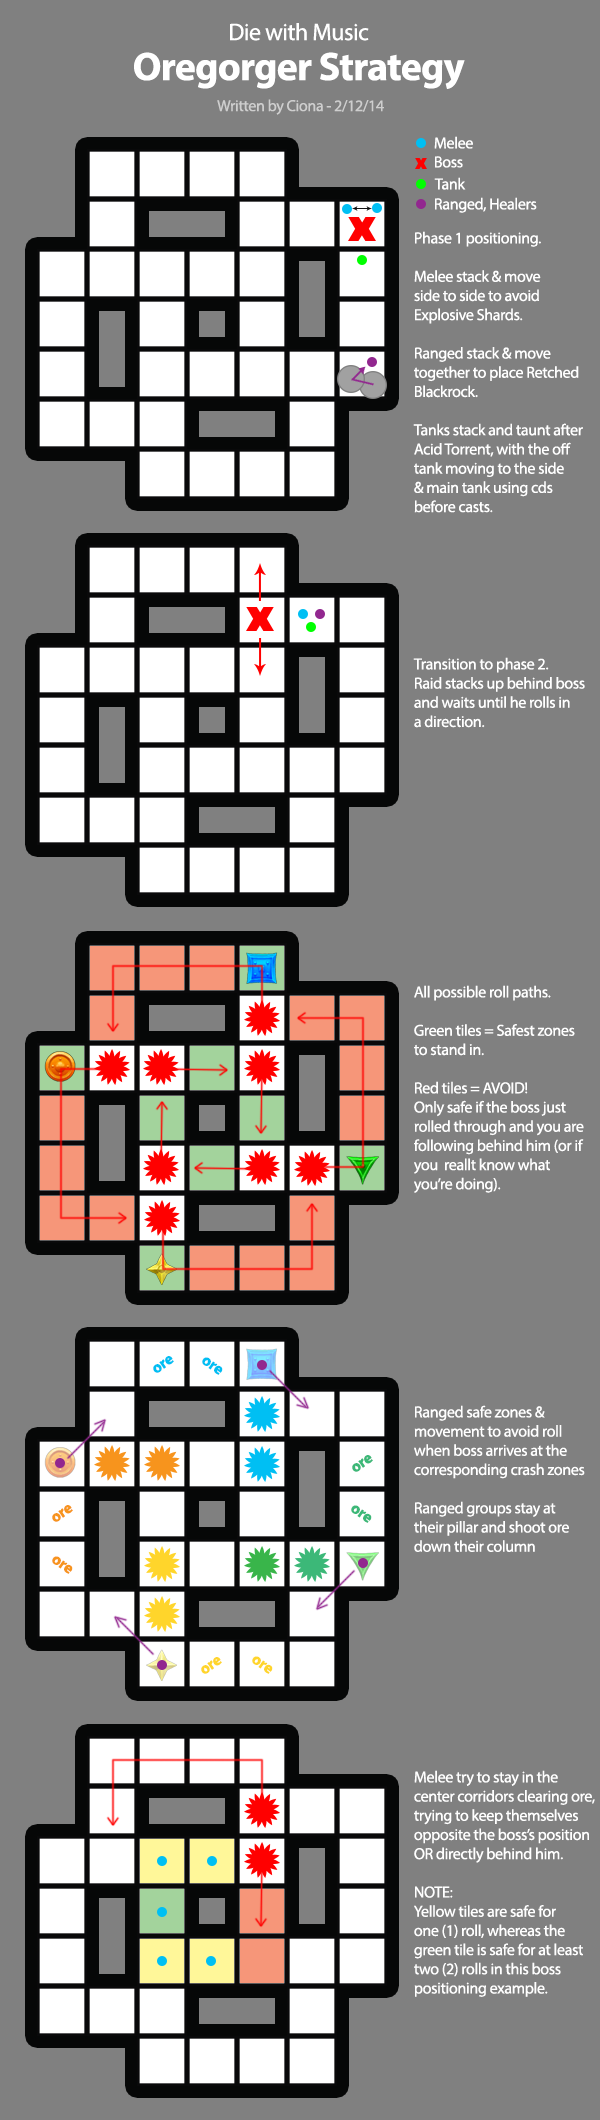
Ya'll may notice it's not the exact same strategy and pillar positions we used the night of our kill, but that's because Apoc and I discussed it afterwards and I made some refinements. I think we could totally follow this model in our future attempts, it gives each player a clear idea of what they should do in which boss positions during the rolling phase, and marks clearly which tiles are safer or less safe than others and which to completely avoid.
Please let me know if there's any error in the guide, I drew it out at about 12am, but if anyone was still confused when we downed him, hopefully this visual map helps!
Also here's the retched blackrock placement I was trying to explain but failing to do so miserably (hard to explain when a picture would do much better!)
The trick to the zig-zag is maximizing the space you have by tucking the next retched blackrock into intersections of previous circles, moving in a zig-zag pattern.
Now I kind of want to see these strategy sketches for all the fights...